BenchPro™ A-Series Height Adjustable Workbenches

BenchPro™ A-Series hydraulic 4 leg workstations have a 12" adjustable range with either an electric lift or a manual crank option.
Image shown with these available options:
- Earthquake safe light and bracket mounts
- Standard adjustable top shelf
- Adjustable bin box rail
- UL listed power strips available in many lengths & designs
- Electric height adjustment switch. Manual and programmable lift options available
- S/H 4-Leg hydraulic lift system with a 12" adjustment range
- 500 lb. capacity upright sets
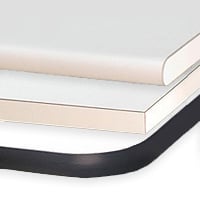
- Rounded front surface edge for user comfort
- Solid stainless steel trim strip
- Solid stainless steel drawer pulls
- Drawers with full extension chrome plated ball bearing slides
Additional accessories are also available. See below for workbench assembly instructions.
Shop Online by Work Surface
Formica™
Formica™ is the heaviest grade laminate available today and used in all standard applications.

ESD Laminate
ESD Laminate is used for applications where delicate electronics could be damaged by static charge.

Cleanroom Laminate
Cleanroom Laminate is sealed on all sides, and is rated for Class 100 (ISO Class 5) environments.

Phenolic Resin
Phenolic Resin is durable nonporous, making it moisture and chemical resistant and easy to clean.
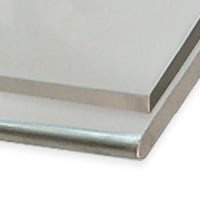
Stainless Steel
These worksurfaces have a particle board core wrapped in 18-gauge, type 304 stainless steel.

Butcher Block
Butcher Block worksurfaces are recommended where heavy use requires a durable material.
Adams Series Workbench Assembly Instructions
BenchPro™ is the only national workbench manufacturer that welds the frame together and assembles it to the top.

1. Place your new workbench on top of a table with the cardboard seam facing up. Open the carton. Do not remove the cardboard yet - this prevents the work surface from scratching.

2. Position the legs. If you have a lot of benches to assemble, we recommend two man teams. If you have ESD benches, make certain the wrist strap jack is on the front side of the leg.

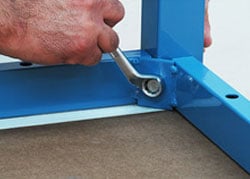
3. Insert one screw with lock washer into each leg.

4. Tighten until lock washer is flat. It doesn't have to be tighter than that.

5. Assembly any accessories. When you're done, you can turn the bench over. For your safety, we recommend two people. Please recycle the cardboard.
 Compare BenchPro Build Quality
We imported a Chinese knock-off of a BenchPro workbench, and documented the results in photos. See the difference.
Sign up to be the first to know about new products, promotions and industry news.
Sign UpProduction Automation Corporation is ISO 9001:2015 Certified.